How To Use
Introducing VaultKi, your ultimate solution for safeguarding your crypto assets with unparalleled security, ease of use and style.
STEP 1
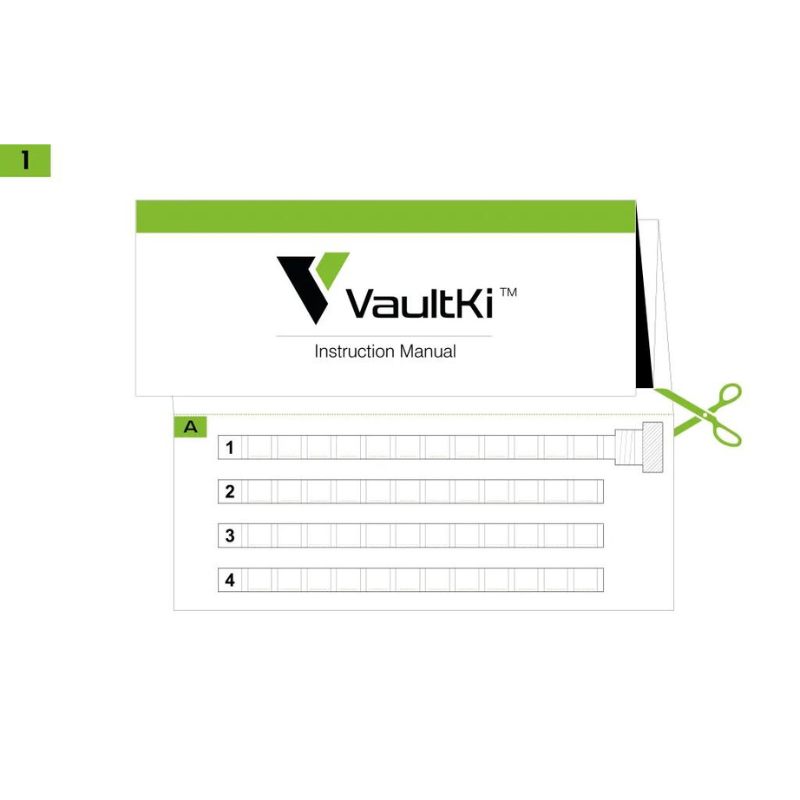
Detach the template pages A and B from your instruction manual.
STEP 2
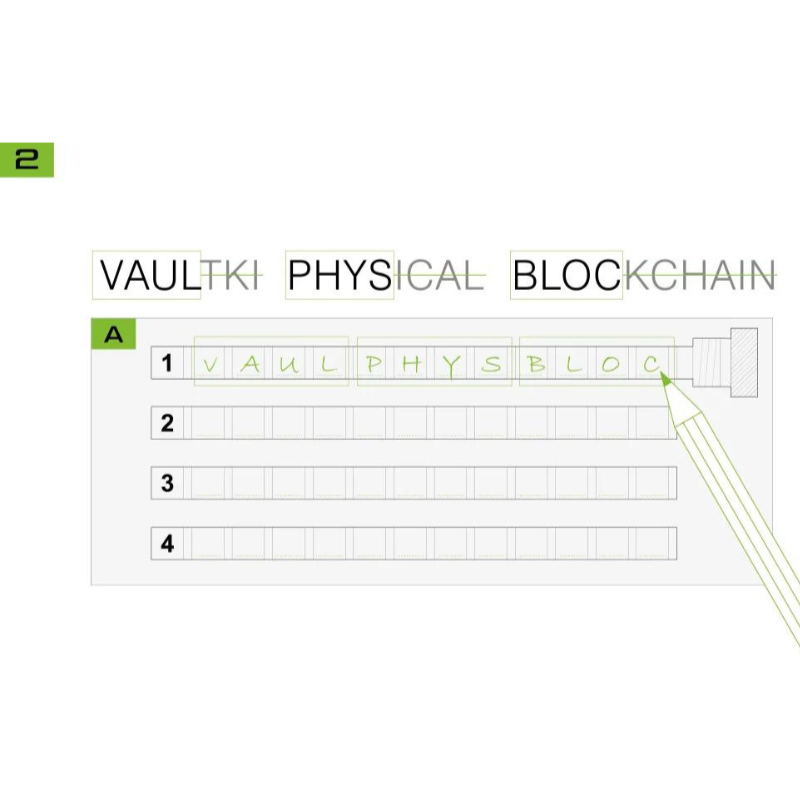
Write down the first 4 letters of each word.These are all you need to accurately recover your seed phrase. No two words from the seed phrase (BIP39 standard) share the same first 4 letters.
STEP 3
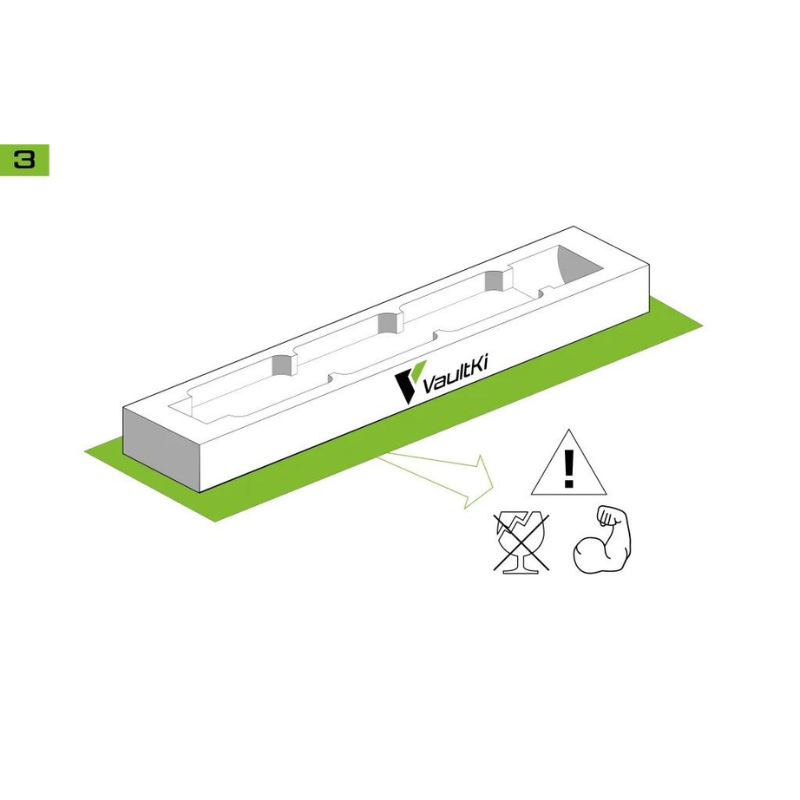
Put your stamping stand on a solid support to prevent damage to your furniture and avoid harming yourself or others.
STEP 4
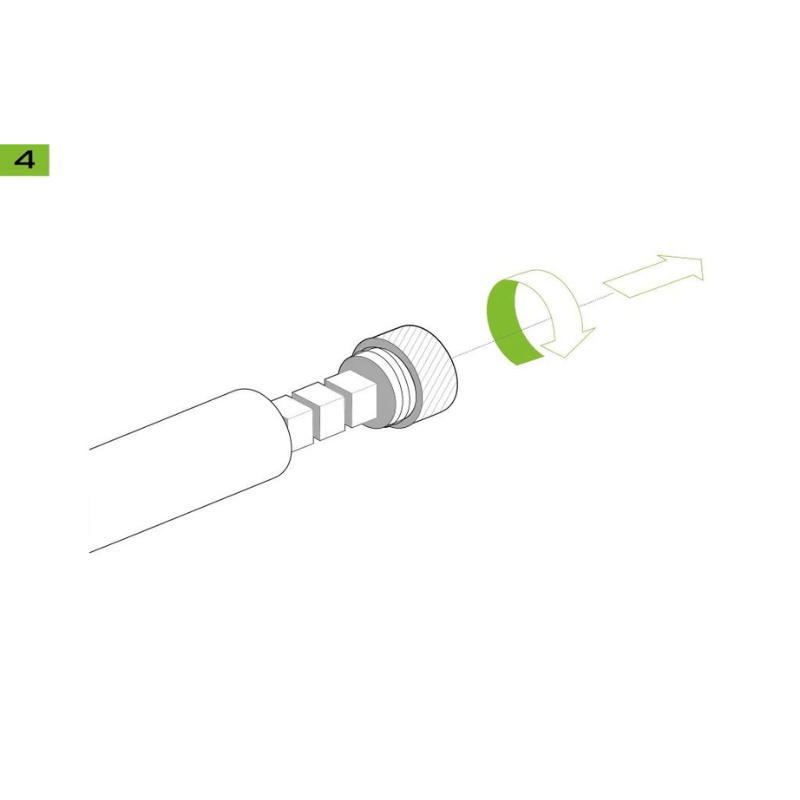
Unscrew your VaultKi to prepare it for installation on the stamping stand.
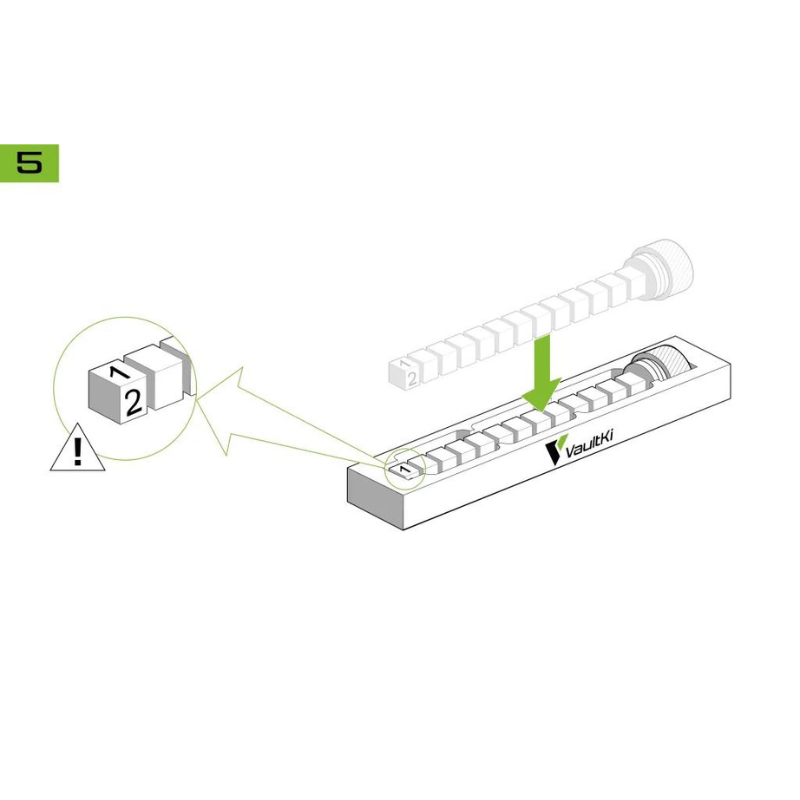
STEP 5
Fix your VaultKi physical blockchain on the stamping stand, while ensuring the number “1” is facing up.
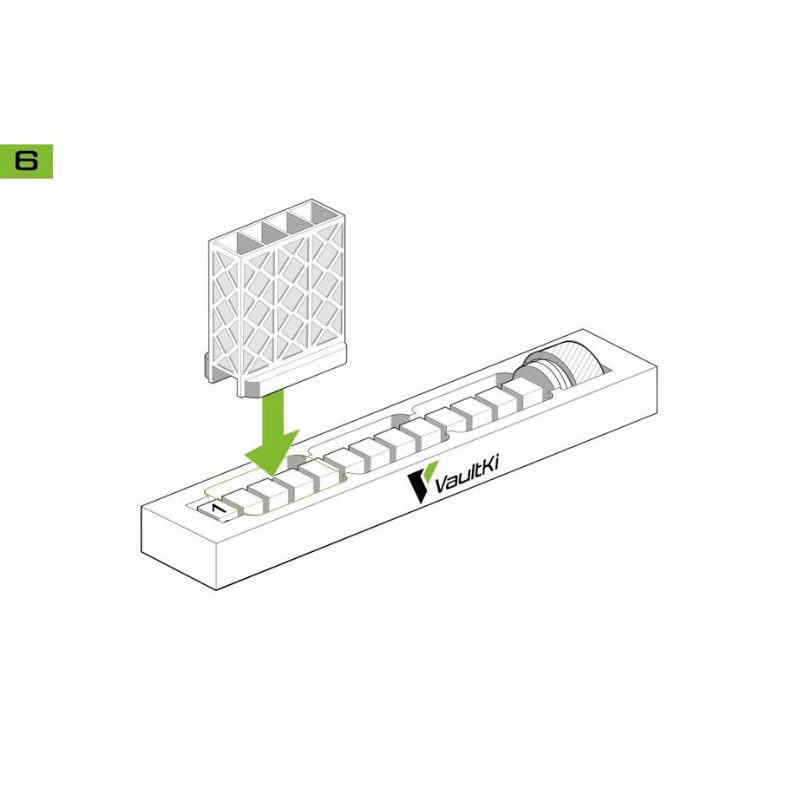
STEP 6
Put your letter punch holder on top of the first four blocks of your physical blockchain.
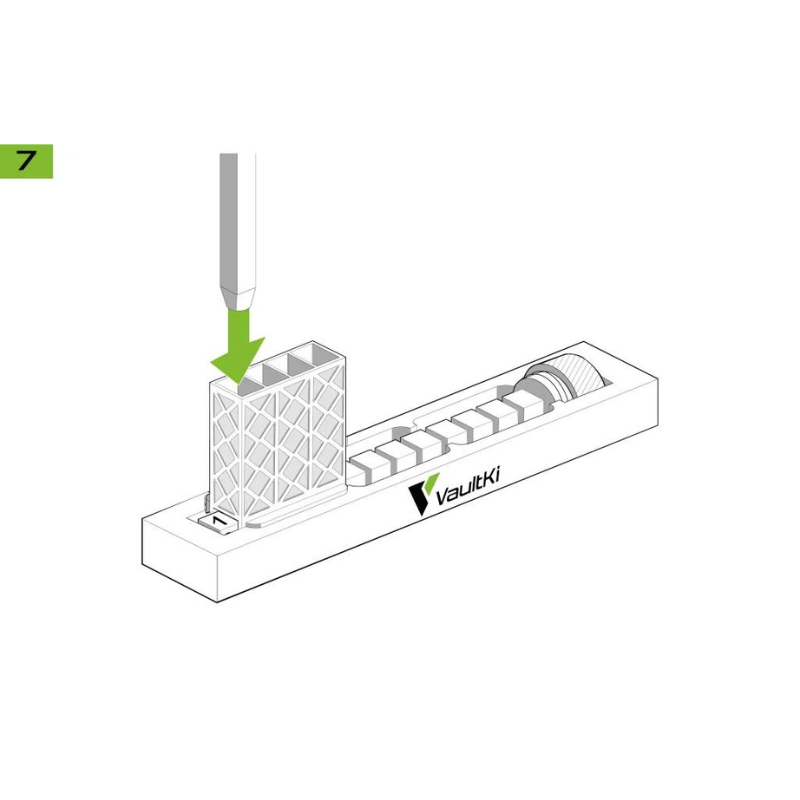
STEP 7
Insert the letter punch of the first word into the leftmost hole. Before permanently stamping any letter, make sure it is in the correct reading direction.
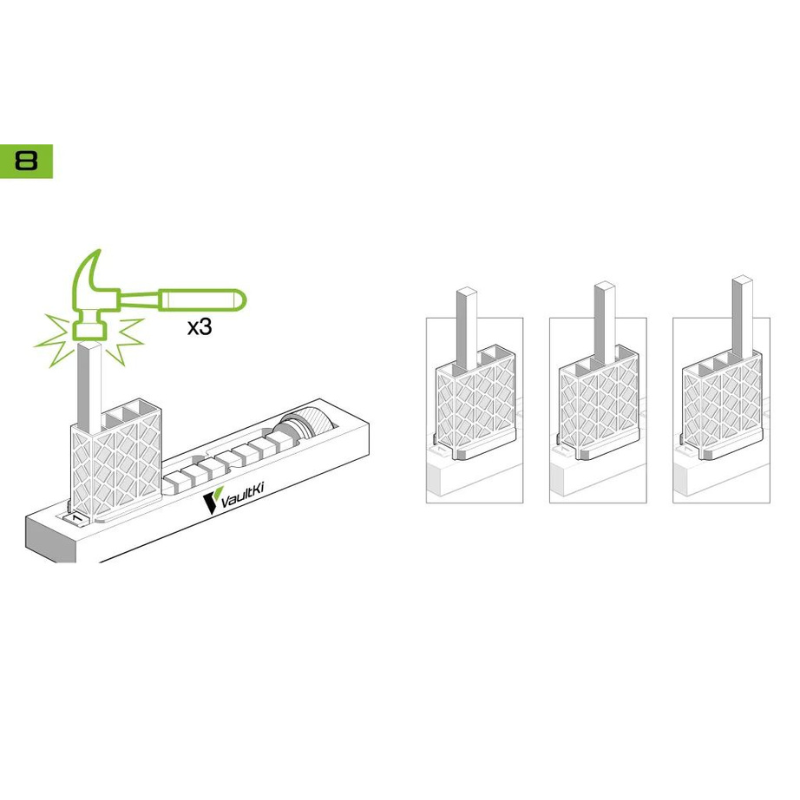
STEP 8
Hammer the letter punch a few times to clearly imprint the first letter on the initial block. Move to the second hole and repeat with the second letter of the first word, then the third and the fourth.
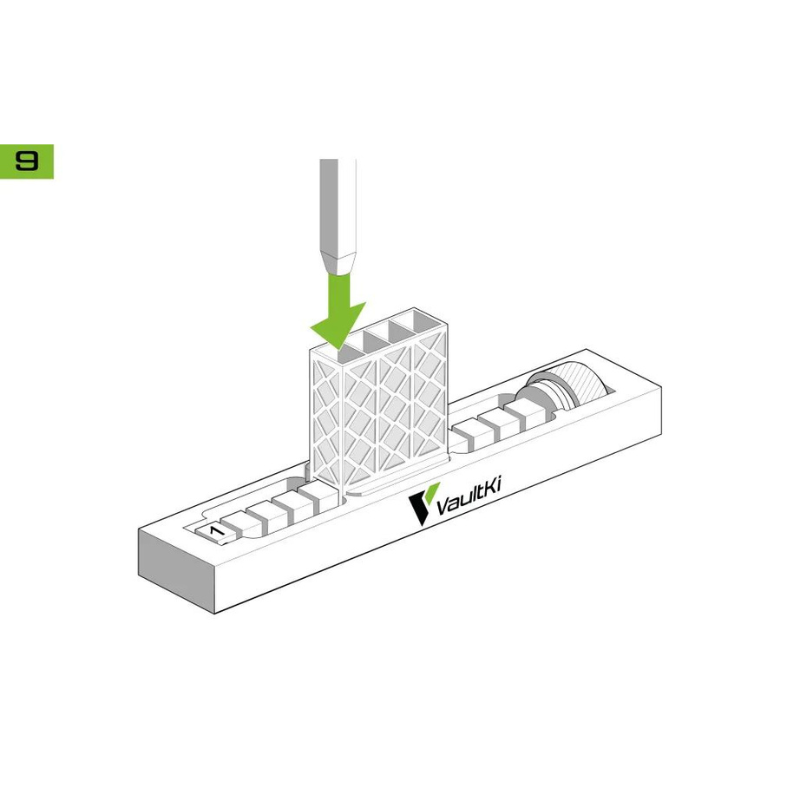
STEP 9
Next, move the letter punch holder right to print the second word of your seed phrase. Repeat the process and stamp the four letters of the second word from left to right.
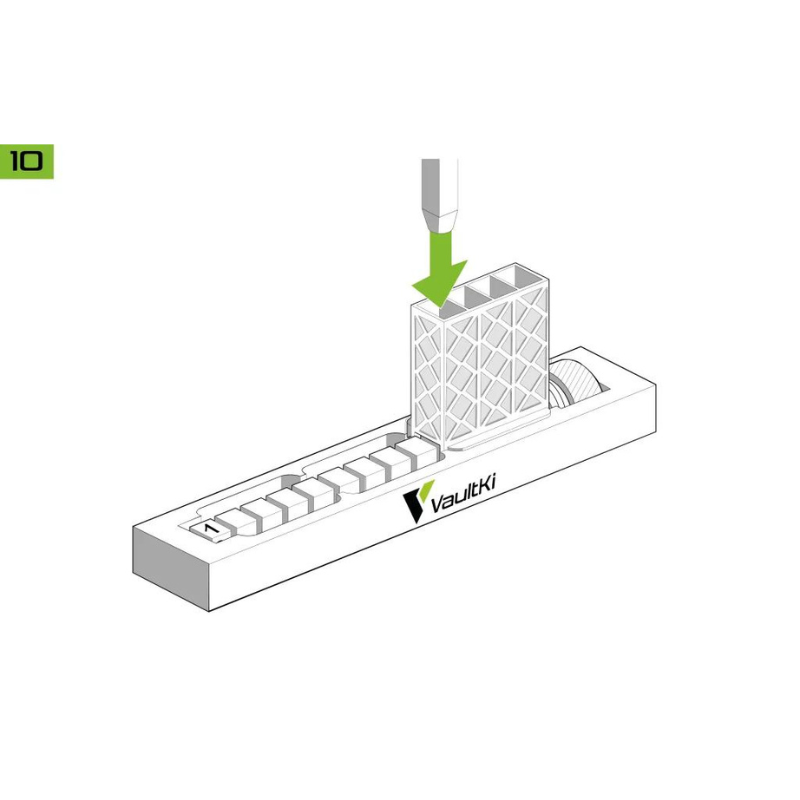
STEP 10
Repeat the process for the third word of your seed phrase.
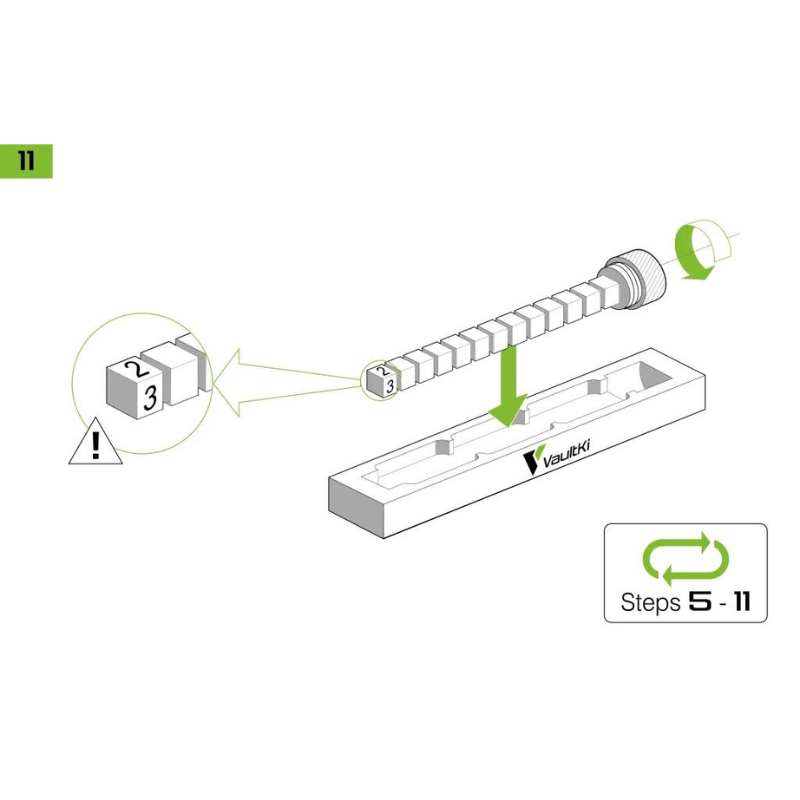
STEP 11
Next, rotate your VaultKi physical blockchain on the stamping stand so that the number 2 is facing up, then repeat steps 5 to 11.
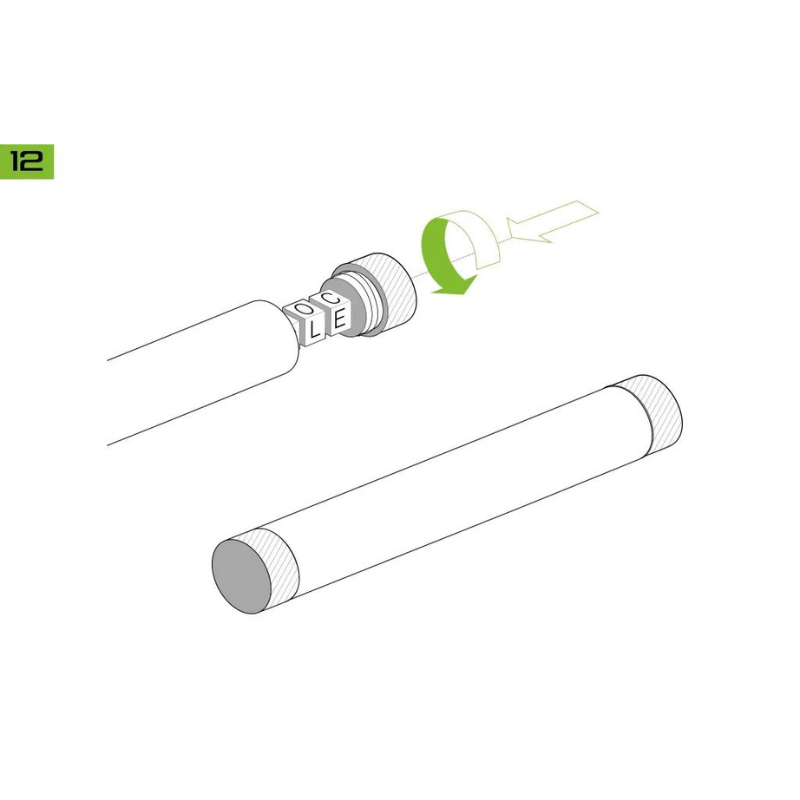
STEP 12
After stamping all your words on your VaultKi, screw it back into their steel covers for protection, and hide it safely. If you chose to acquire the VaultKi X2, place each half in a different location for extra safety.
FINAL STEP
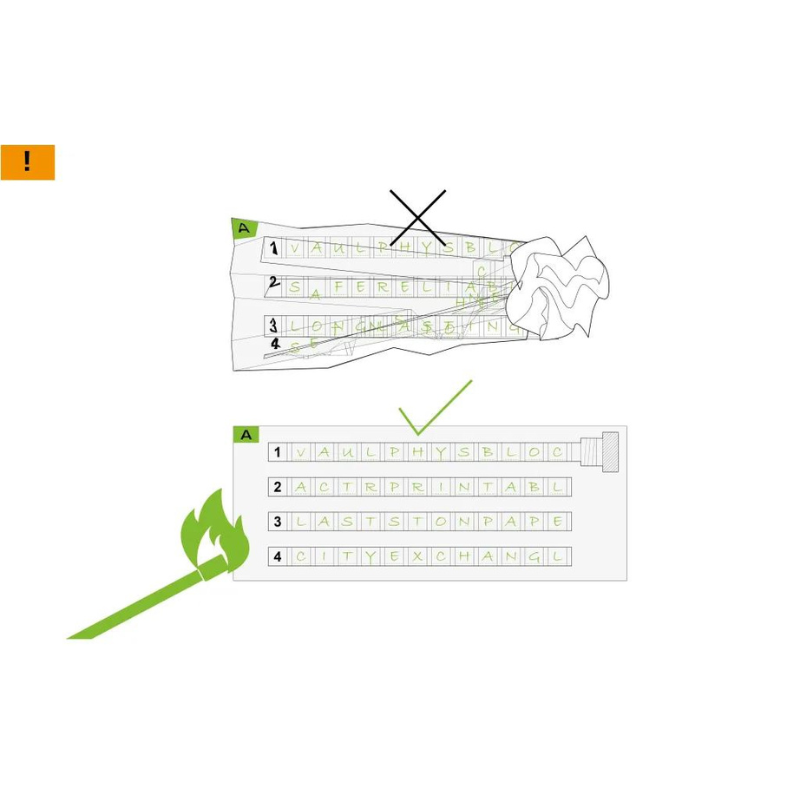
Lastly, ensure to burn pages A and B to ashes. Simply discarding them before destruction exposes you to the risk of theft if discovered.
